
How to Make Vertical Video with iMovie on Mac and PC
For the time being, iMovie could only export landscape (horizontal-oriented) video. If you used iMovie to edit portrait videos created either by your mobile phone or computer, you'll find out that additional black bars on the both sides of the original vertical video are added automatically. The following picture shows a typical vertical video edited with iMovie. Or you have to squeeze your vertical video to be horizontal, losing top and bottom parts of the video.

I don't think this is what you want. In this article, I will show you how to make vertical videos in full screen with iMovie using an easy workaround method, but having some limits. Alternatively, you could also use a more powerful video editor for Mac to edit vertical video without limits.
- > Part 1: How to Make Portrait Video with iMovie and QuickTime
- > Part 2: How to Make Vertical Video without iMovie
Part 1: How to Make Vertical Video with iMovie & QuickTime Player
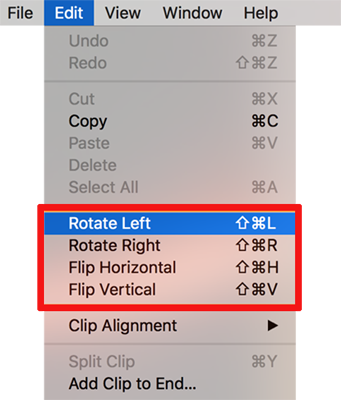
To avoid black bars in iMovie, you need to rotate your vertical video to horizontal orientation. To do so, just select your clip on the timeline and click on the Crop button on top of the preview windows, then click Rotate Right. Now you could continue editing vertical video in iMovie and export to full-screen portrait video. That said, iMovie themes and titles are not suitable for editing vertical videos any more. iMovie is designed for making landscape video only.
When editing complete, output a landscape video without black bars Next, locate your video in Finder, right click on it and choose QuickTime Player from the Open With menu. In QuickTime Player, go through Edit > Rotate Left. All set! You can now upload vertical video for sharing on Instagram Stories, IGTV, Snapchat, Byte or TikTok. Vertical videos are natively supported by these platforms.
Part 2: Making Vertical Video with iMovie Alternative - Movavi Editor
In this part, I'm going to show you how to make vertical videos natively with titles, clip arts, filters, and more. Movavi Video Editor is your perfect video editor to edit vertical videos shot on your iPhone or camera. Get a free trial right now.
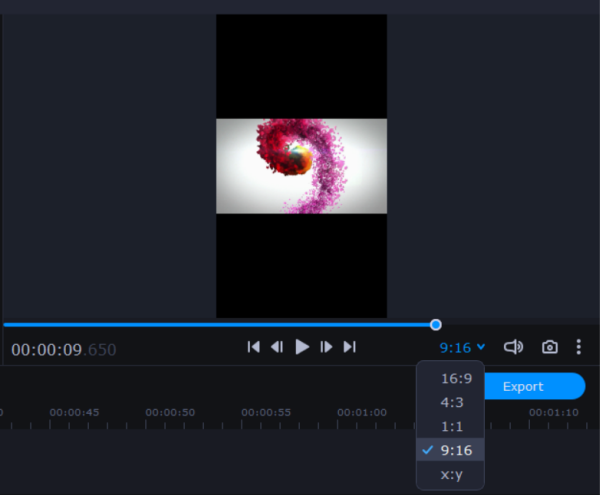
1. Start Vertical Video Editor and Set Aspect Ratio to 9:16
Start Movavi Video Editor when installation complete. To set the orientation to vertical, click on the aspect ratio down arrow and choose 9:16. You could then click Add Files in the Import tab to import your video to the media bin. To start editing vertical video, drag and drop it from media bin to the timeline.
2. Editing Vertical Video with iMovie Alternative
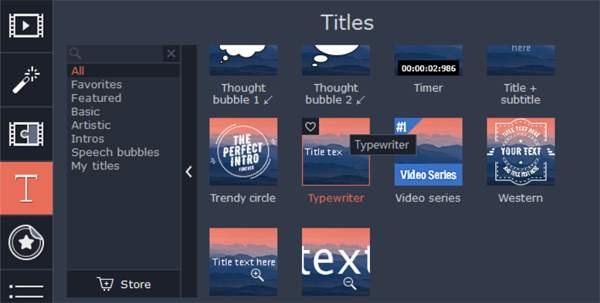
Movavi Video Editor contains an array of preset filters and titles, with which you could instantly enhance your vertical video and output full-screen portrait video. No black bar guaranteed. For example, if you want to make an aged-style movie, you could go to the Filter tab on the left and drag the "Old movie - vignette" to the video on timeline.
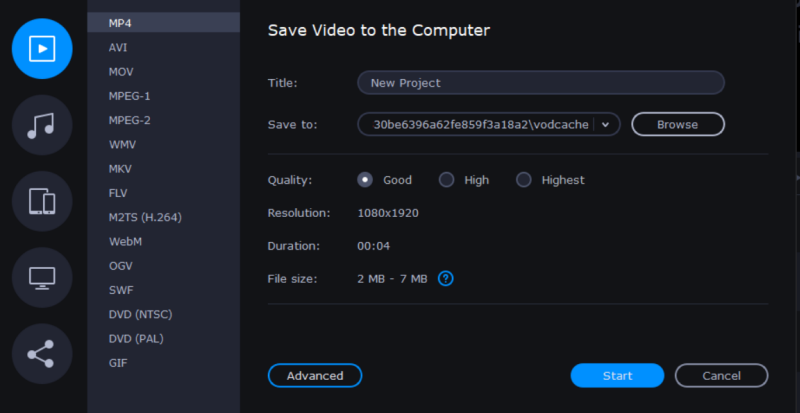
3. Export Vertical Video without Black bars
To output the finished vertical video, click the Export button. The follow dialog will show up. By default, the vertical video is 1080x1920 in dimensions. If not, click Advanced, set the Resolution option to Custom and input 1080x1920. Finally, click Start to encode your portrait video and all done. It's ready to send vertical video to others or directly upload to social platforms for sharing.
Vertical Video Making Conclusion
Using some tips and tricks, you're able to create vertical video with iMovie. However, the powerful features of iMovie themes, titles and more have to be given up. By contrary, if you use an video editor like Movavi Video Editor, vertical video editing is fully supported. Like iMovie, this alternative comes with plenty of titles, filters, transitions, stickers, as well as much more powerful features like "Highlight and Conceal", "Pan and Zoom", and "Slow Motion".


Video Editing Tips
- Best Video Editor for PC
- Add Music to iMovie
- Adding Permanent Subtitles
- Adding Titles with iMovie
- Add Transitions to Clips
- Add Voiceover to Video
- Add Text or Photo Watermark
- How to Do Typewriter Effect
- Blurring Video with iMovie
- How to Remove Watermark
- iMovie Audio Removal
- iMovie for Windows 10
- iMovie for Windows Free
- iMovie Not Working on Mac
- Quickly Remove Watermark
- iMovie Equivalent for PC
iMovie for Windows | Download | Privacy Policy | Contact Us | iMovie Blog | Store |
Copyright ©
iMovie For Windows Dot Com. All rights reserved.
Browser compatibility : IE/Firefox/Chrome/Opera/Safari/Maxthon/Netscape